How to Install LuckPerms to Your Minecraft Server
Iceline Hosting
November 29, 2022 • 11 min read
By default, Minecraft plugins come with their own set of permissions assigned to server operators, meaning that if a user wants to have access to them they must be set as an operator in the server’s console, risking and compromising the security of your Minecraft server, a huge risk to take more in consideration if you want to run a server in a high scale, where it’s really necessary to keep a group division between normal users, users with custom benefits (commonly called VIPs), and the moderation team. Fortunately, there are plugins designed for this purpose, such as LuckPerms.
LuckPerms is a Minecraft plugin that allows to create different groups or ranks and assign them permissions coming from other plugins, allowing to create groups of moderators, administrators, helpers, builders, users, and VIPs and assign them unique permissions and own features, granting the server’s security and imposing a hierarchy. You can create a VIP rank and, with a plugin like Tebex, assign it automatically to a user after making a purchase in the designated server’s webshop; limit the existing moderation tools for helpers and moderators, allowing you to keep the most powerful commands to the higher-ups and more trustworthy users; or even allow your builders to use worldedit and any other plugin’s building commands without being administrators!
Aside from other similar plugins, LuckPerms has been getting constantly updated as the years came by and it’s completely free. LuckPerms counts with his own powerful web editor that will let you configure the permissions of the server in real-time at any moment, even allowing you to see a list of the permissions added by other plugins, making the configuration process very intuitive and really easy. Groups and permissions can also be configured through the server’s console or in-game, is up to you!
In this guide, we’ll go through the installation process (manually or through the Plugins tab from our game panel), the use of the web editor, how to create a group, and assign permissions (from our other plugin’s tutorials), and players to it. We’ll also create a few example groups that you may find really useful.
The LuckPerms file will be downloaded on your pc, now you’ll need to upload it to your server
LuckPerms has been installed! now we’ll go through some of the configurations so you can set your first group with permissions
Before starting, we’ll need to set ourselves as server operators so we can access the LuckPerms commands.
/op Your UsernameBefore starting, we’ll need to set up the web editor for the first time, this can be done by doing the following:
/lp editor

The plugin will be connected to the editor temporarily, and we’ll be able to make changes directly without any issues!

We can now start creating groups, for this example we’ll create a group called User with a few colors in the prefix, there are two ways to do this:
Type
/lp creategroup Name of the group WeightFor example:
/lp creategroup user 10We’ll have to assign the prefix now, for this we’ll use the following command:
/lp group user meta addprefix 10 "&8[&6User&8]" In this example, ‘user’ is the group we’re modifying with the meta addprefix command, 10 is the weight, and the value is the color and text that will appear before our name in the chat.


Group name: group id that will use for the commands

Weight: number of priority the rank will take over others, the more the weight the more the priority

Display name: Alias you can use to identify the group

Prefix: The text that will appear behind our name in the chat, it supports colors as in the example above. Make sure you have Vault installed or it won’t work

Parent: The group from which our new group will inherite permissions, all the users get placed into the ‘default’ group initially.

Suffix: The text that will show next to our name, it supports color as well.
We’re creating a group with an id of ‘user’, a weight of 10, a display name or alias of ‘Default User’, and a prefix of &8[&6User&8].
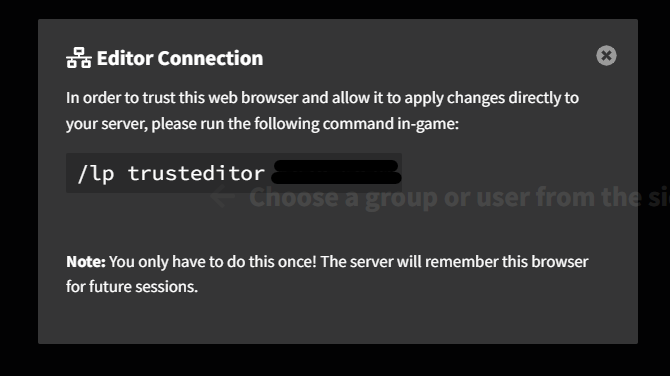
If your editor ran out of time due to inactivity, you may get the following message:

You can add users to a group by using the following command in the console:
/lp user Player Name parent add Name of the GroupFor the example above, we’d use
/lp user Iceline parent add userA message will show up in the console letting you know the command has been processed


As you can see, the user Iceline has the prefix (with colors) we assigned to the user group
You can remove a user from a group by using this command:
/lp user Username parent remove Group
You can remove a user from a group at any time by pressing the X on the name and saving the changes

Now that we’ve established how to create a group and assign players to it, we can finally start going further into the assignment of permissions. There are two ways to do this
We’ll use the ‘permission set’ subcommands from /lp group or /lp user for this, type:
/lp group Group Name permission set Permission.Name true/false You could also set a permission for a specific player, just replace ‘group’ with ‘user’ and ‘Group Name’ with the name of the player
/lp user Username permission set Permission.Name true/false For example, we’ll add the EssentialsX tpa, tpacancel and tpaccept permissions to the User group we had previously created, meaning that any player on the ‘User’ group will have access to those commands
/lp group user permission set essentials.tpa true
/lp group user permission set essentials.tpacancel true
/lp group user permission set essentials.tpaccept true 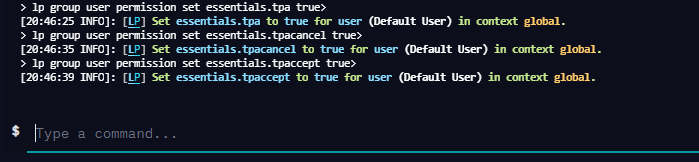
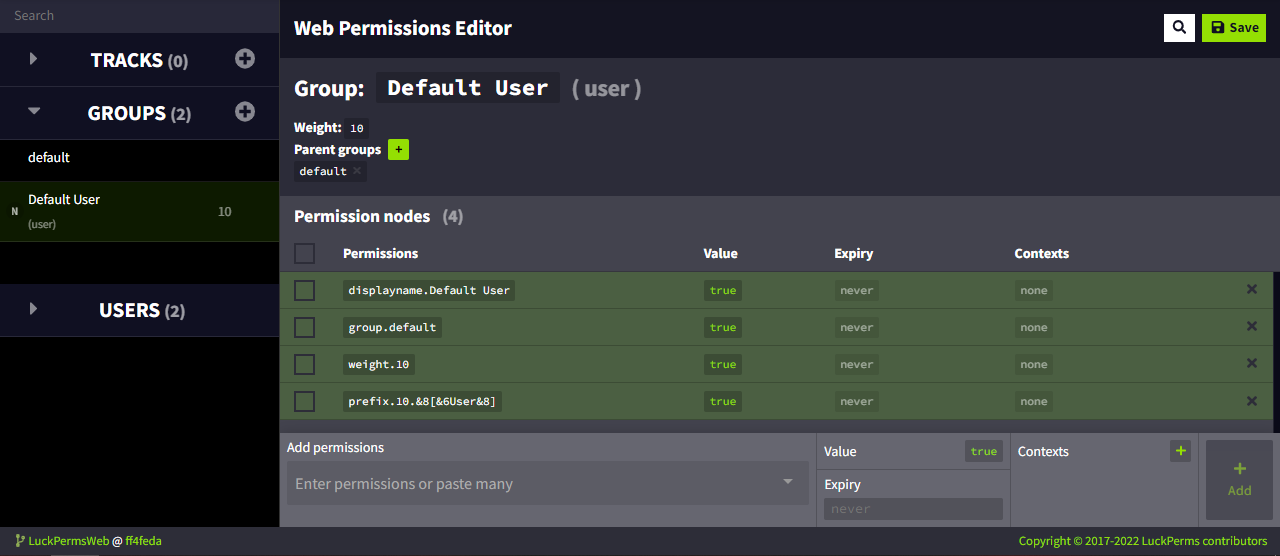
We can also use the web editor to add permissions for our groups in a more intuitive way, letting you look at a list of the available permissions from that plugin.
Select a group and type the permissions in the ‘add permissions’ box at the end of it. We’ll now add the warp and warp.list permissions from EssentialsX to our User group
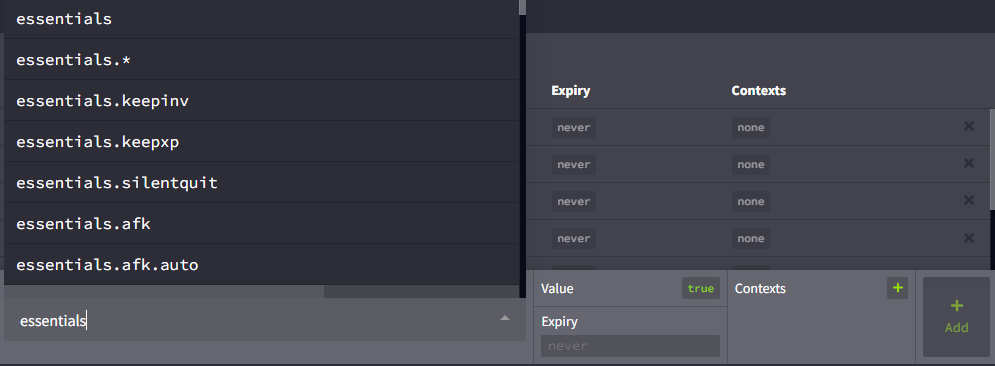

There you can also modify the expiration date or the context in which this permission will be applied (On a specific world-only for example).
The process to remove permissions from a group is more or less the same as assigning it, it can also be done in two ways:
By using the “permission unset” subcommands from /lp group or /lp user
/lp group Group Name permission unset Permission.Name
/lp user Player Name permission unset Permission.Name
For example, if we want to remove one of the permissions previously assigned to the group ‘User’ we’ll do it this way:
/lp group user permission unset essentials.tpa
Select the group, you’ll see a list with every permission, just press the X at the right of the permission you want to remove, then save the changes

You can set the permissions to be “inherited” or “passed” to another group or user, essentially saving time by removing the need to write the same lines again and again for each group.
We’ll use the ‘parent add’ and ‘parent remove’ subcommands from /lp group and /lp user for this. This is the syntax:
/lp group Group Name 1 parent add Group Name 2This means that Group 1 will inherit the permissions assigned to Group 2.
For example, we want our User group to inherit the permissions assigned to the Default group (which in this case, is essentials.afk):
/lp group user parent add defaultEvery player assigned to the ‘User’ group will now also have access to the EssentialsX /afk command. You can also remove it at any time through the “parent remove” subcommand, for example:
/lp group user parent remove default
That’s it! you’ve now learned how to create your own groups, assign permissions, and how to inherit permissions between groups. You can now create your own group hierarchies and limit the commands on your server!
We’ve created a few group examples with permissions from our other plugins tutorials for Minecraft, which you can see here
We are going to create a VIP group with some special benefits from EssentialsX commands and a custom prefix, this is really useful since we can then sell this rank to other players on the server by using a plugin like Tebex, which will help with the costs of the server.
We’ll start by creating a group named ‘VIP’, with its own prefix, a weight of 20 (meaning that it will take priority over the default group, whose value is set to 10) and that will take the User group we created as the “parent” (and inherit all the permissions set to it)

Aside from the default permissions, we’ll assign special features such as:
-Access to /heal /feed /nick /echest
-The possibility of creating more than 1 home (to a maximum of 5 assigned to the group VIP in the EssentialsX config.yml file)
-Use colors in the chat and nickname
So we have to add the following permissions:

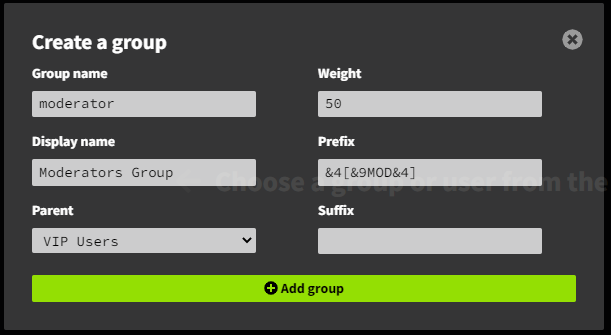
We’ll also need to make sure to have our own group of staff to make sure the server rules are being followed. We’ll start by creating a group called Moderators with a weight of ‘50’ (to make sure it gets priority over any other groups created, such as higher VIP ranks), with the VIP group as the parent (so it also gets the special benefits) and with its own custom prefix
Since they will be in charge of enforcing the server rules, we want to make sure to give them some of the moderation tools already covered in our EssentialsX tutorial, those being /ban /mute /jail /tempban and /banip, alongside other tools that may be helpful such as /gamemode, /god and /fly

Creating an admin group is easy, as we would usually assign all the permissions from each plugin to it, we’ve set its weight to 90 so it gets priority over all the previously created ranks and set a custom prefix too, it is not usually needed to set a parent for it since we’ll be assigning all the permissions to this group anyway.
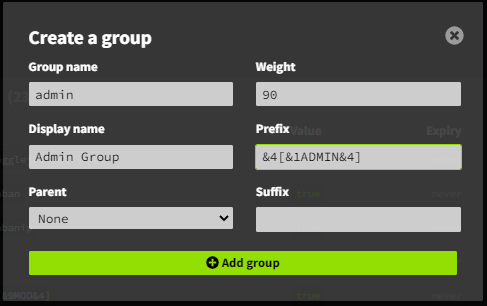
To assign all the permissions corresponding to that plugin, we’ll use the ‘wildcard’ (*), in this example we’ve assigned to the group Admin all the permissions from AuthMe Reloaded, EssentialsX, Duels and WorldEdit.

Make sure you’ve written the permission correctly. If you are still having issues after this, feel free to contact Iceline Hosting’s support for further assistance.