How to install AuthMe Reloaded to Your Minecraft Server
Iceline Hosting
November 29, 2022 • 6 min read
New vulnerabilities are found daily In the times of modern informatics, which may compromise your server and its information, one of the reasons why you shouldn’t just have one way to log in. Providing a way to reauthenticate users before joining the server will be essential in the protection of their information and progress. There are multiple ways and plugins to do this, but in this case, we’ll talk about AuthMe Reloaded
Working since years ago, AuthMe Reloaded has remained as one of the best authentication plugins for Minecraft servers, adding a login and signup system to your server, making users have to authenticate their accounts through a password every time they join the server or they won’t be able to break blocks, see the inventory or use any other commands.
AuthMe Reloaded saves that information encrypted in an internal database or external database (supporting MySQL and SQLite), protecting it against attempts to steal it. Under its features, AuthMe Reloaded also supports adding an email to your account for password recovery; using 2FA; restricting the number of accounts per IP and country; multiple languages; and it saves the last location on which the user logged out. AuthMeReloaded also comes with default messages that can be changed through the configuration file if needed.
AuthMe Reloaded includes a series of permissions that can be configured and assigned with a plugin like LuckPerms, like commands oriented to administrators, so they can change passwords manually or deregister accounts. It is also worthy to mention that this plugin is essential if you’re running a test server in offline mode, otherwise, anyone will be able to change its name and join your server without any problem
Now that you have downloaded the file, you need to access your server files through SFTP, here’s a guide on how to do it
AuthMeReloaded has been installed and should now be working on your server!
Once you log into the server, you should see an automatic message in the chat telling you to register by typing
/register <password> <confirm password> Once that’s done, you can log into the server in the future by typing
/l <your password>You won’t be able to do anything else without logging in first
/email add <your email> <confirm email>That’s it! if you don’t remember your password you can reset it in the future by typing the following commands in this order:
1- /email recover - A code will be sent to your email
2- /email code <code> - Use that code for verification
3- /email setpassword <new password> - Change your password/2fa add/2fa confirm <code>That’s it! you can now join your server by using
/2fa code <code>AuthMe Reloaded has a bunch of options on its config.yml file that can be enabled/disabled as you wish, we’ll cover some of them here.
You can find your configuration files on /plugins/authme/
AuthMe Reloaded supports remote databases, for this, you’ll need to replace the default values on the following variables with your database credentials.
You can find your credentials in the ‘Database’ tab of the Game panel, learn how to create a database here!


backend: change it to MYSQL
mySQLHost: Your database host address (game-db-ca-1.iceline.host)
mySQLPort: The database port, should be 3306 by default
mySQLUsername: Your database username (u84255_t5hXfDS5OG)
mySQLPassword: The database password 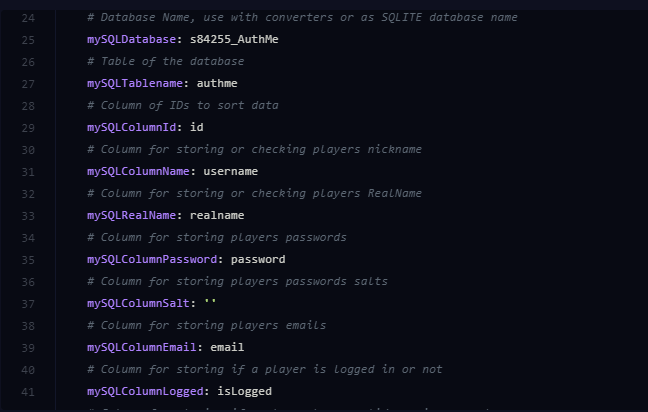
mySQLDatabase: The database name (s84255_AuthMe)
mySQLTablename: The table of the database on which the user data will be stored
The rest of the variables in the picture correspond to the Columns in the table ‘authme’ from the database, it can be modified if you want but I suggest leaving it that way.
That’s it! the next time you start the server the plugin will automatically connect with the database and create the table.

In the config.yml, search for the messagesLanguage variable and replace the value en (English) with one of the available translations, use es for Spanish, bz for Brazilian, de for german, pt for Portuguese, vn for Vietnamese

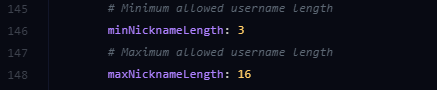
Look up minNicknameLength and replace the minimum username length needed to join the server and maxNicknameLength for the maximum.
Look up maxRegPerIp and change it to the value of your choice, you can set it to unlimited by changing the value to 0.

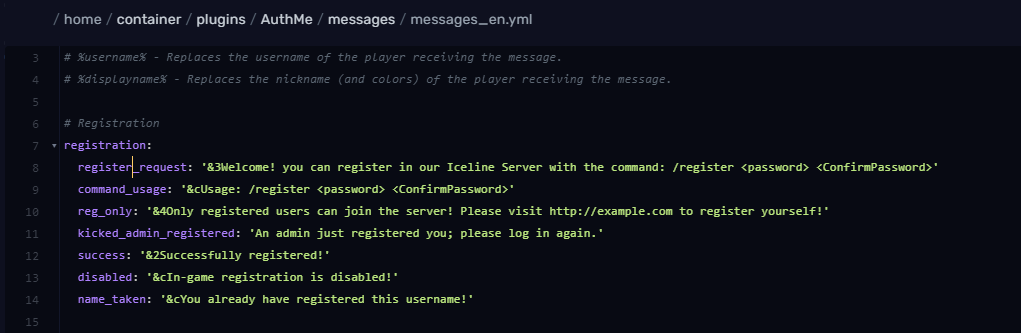
You can change the default messages (when joining the server, or when registering an account..) by modifying the messages_en.yml file. Just head to your plugin’s folder, and click on the /messages/ folder
The messages are organized in their respective categories, just search for the one you want and replace it as needed. For example, I’ve modified the register_request message:
Restart the server (or run /authme reload) and the new configuration will take effect

You can see the commands available by using
/authme help - General commands
/email help - Email related commands
/2fa help - 2FA related commands
Keep in mind that some of the commands can only be used by administrators, so make sure to set that permission.
A list of all the available commands can be found here
With a plugin like LuckPerms, add the following permissions to your respective groups:
authme.player.* - All the basic commands intended for users
authme.admin.* - All the commands intended for admins
Learn how to add permissions with LuckPerms with our tutorial!
A list of all the individual permissions can be found here
Make sure you’ve set the right permissions, and that the plugin is correctly working on your server. If you are still having issues after this, feel free to contact Iceline Hosting’s support for further assistance.